Don’t be afraid to have your friends and family over this year. Even if your home is looking a little tired, there’s still plenty you can do to freshen it up before festivities commence. Here are seven low-mess, low-stress ideas for an interior upgrade.
1. Accessorize
Adding or changing pillows, lamps and draperies are great ways to transform the feel and look of any space. Eric Bloom of Warner Interiors in Westlake suggests seasonally switching out pillows and draperies as an inexpensive way to update a living room.
“People don’t realize how much accessories can change a room,” he says. “It’s like women’s clothes. You can take a really basic Chanel suit and make it look even better by adding a great pair of shoes, jewelry, a handbag and even a hat.”
But to make a noticeable impact, Bloom says you have to change a few things in any room you want to dress up. One small modification won’t be enough for anyone to notice.
Lighting is another way to easily alter the feel of a room. Soft light sets a relaxing mood and makes guests feel at home. Add a floor light behind a sofa or use candles to enhance the ambiance. Try adding votives and sconces with a couple different scented candles such as pumpkin pie, ginger or vanilla.
A tip as you start to accessorize: “Get everything out of your room and bring everything in one by one, and box up things that have been sitting there collecting dust,” says Kelly Edwards, a design coordinator for the Chicago cast of Home and Garden Television’s “Design on a Dime.” “This way you can start with a clean slate and be clutter-free.”
2. Accentuate
Bookshelves are an easy way to dress up any room. The designers from HGTV’s “Design on a Dime” have devised a do-it-yourself bookshelf that works on any budget. You can create a unit that fits your tastes and space for as low as $35 up to $110 (directions on how to tackle the project at three different prices and pictures of all three are available at www.hgtv.com, but here are the directions for building the basic shelf):
You will need wood of your choice in the following sizes: one 18-inch-by-12-inch piece for the top, two 3-foot-by-1-foot pieces for the sides and three 16-1/2-inch-by-12-inch pieces for the shelves and base. You’ll also need a 3-foot-by-1-foot, 1/4-inch piece of finished plywood for the back.
How To:
1. Sand each piece and wipe down with a clean, dry cloth.
2. Stand the top, two shelves and bottom on their sides and place one of the bookshelf sides on top. Attach with nails spaced two to three inches apart.
3. Attach the opposite side and plywood back.
Once the bookshelf is complete, you can customize it to your liking. HGTV’s Edwards also has other creative uses for the basic bookshelf.
“I flipped a bookshelf onto its side, sewed a skirt and attached it with Velcro then made a seat cushion for it. I made it into a window seat,” she says. “I’ve also flipped a bookcase and added wheels to it to turn it into an entertainment cart. The guy lived in a small apartment and needed space, so he stored his barware, drinks and books in the bottom. We hid the mess with a fabric skirt.”
If you’re going to create either of the above modified bookshelf projects, Edwards suggests adding a piece of wood in the back for additional support.
3. Organize
When friends and family come to visit, you want to make sure you have somewhere for them to hang their coats, hats and scarves. If you don’t have a big enough coat closet, take an afternoon and make your own decorative coat rack or hooks.
“Know how many guests you’re going to have, so you can be prepared,” says Marissa Iacovetta, an interior designer with Reflections Interior Designs in Cleveland Heights. “You don’t want to be throwing coats onto the bed in the guest room then having your guest want to go to bed, but can’t.”
Iacovetta also suggests buying a chest or trunk and painting it to accentuate your guest room. This way, you have a place to store bed sheets, pillows and blankets, while adding a homey touch to your room.
Don’t forget closet space when adding organizational pieces. Putting baskets or bins on closet shelves provides a place to put the kids’ toys and stuffed animals, so you can keep them off the floor.
4. Enlarge
If your guest bathroom feels a little ordinary, there are a few easy ways to make it feel more like a suite. To give the bathroom a larger feel, try changing the flooring. The eye will be tricked into seeing a larger room by adding lighter colored, larger tiles. The minimal use of grouting gives the illusion of more floor space. Neutral colors are also a good way to give any room a longer life.
Trends come and go, but neutrals last forever.
To make your bathroom feel more special, add floral arrangements and candles, says Jane Frankel of Jane Frankel Interiors in Beachwood. “Treat it like it’s a jewel box,” she says. You can also add special wallpaper to make it feel more like a powder room in a fancy hotel, rather than just a plain old bathroom. Try a foil-faced, embossed or grass-cloth paper.
You could also paint your cabinets a lighter color. Lighter, brighter colors create the illusion of more space, rather than deeper colors or darker wood grain.
5. Brighten
To change the look of a room entirely, Bloom suggests a fresh coat of paint. “The walls are the largest surface of the room,” he says. “You have to change the color entirely, not just repaint with the old color. No one will notice if you just freshen up the color.”
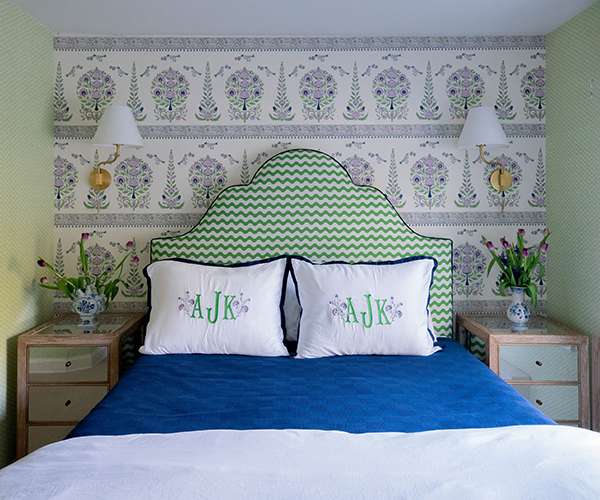
For maximum impact, Bloom suggests painting just one wall in an accent color, which will draw attention to a specific area of the room. Make sure the accent color is a significantly different, complementary color to get the full impact.
When decorating the room, add pieces that incorporate your accent wall color. Then, place accessories that have some of the color of your other walls in front of your accent wall. This way, Blooms says, the color scheme stays complementary.
7. Reuse
To spice up your kitchen, make some changes to your cabinets. For a little under $30, you can buy a can of paint and freshen up the color. Complete the look by including decorative finishes, such as stencils to the flat paint. If you don’t want to paint the cabinet fronts, replace them with new ones. Door fronts can be as inexpensive as $20 a door.
Or if you have glass panels in the cabinet fronts, replace them with a decorative piece of glass or frost them with a special spray. It’s easy and inexpensive. Also, consider changing cabinet doorknobs and hinges, a little change that can make a dramatic difference.
“Doing this is maximizing the look and minimizing the price,” says Edwards. “You don’t have to spend a lot of money to make a real impact.”
Replacing appliances is always a great way to update the look of a kitchen. If that’s not in your budget, Edwards says, you could always consider repainting them with a special appliance spray paint, which is inexpensive and can make a quick, dramatic difference.
6. Add Texture
Besides a basic paint change to a wall, Edwards suggests textured wallpaper, which can be purchased at any major home improvement store.
“It’s awesome,” he says. “You can paint right on the paper and it comes in a variety of different patterns.” And it’s not just for the walls. She has used the wallpaper to change the look of closet doors as well.
If you don’t want to put up wallpaper, Edwards suggests painting a stencil. You can get basic stencils at craft or home improvement stores. But if you want a truly unique stencil, try the Internet. To make it feel more like a special detail rather than a major accent, use colors for the stencils that are similar to the wall color or stain. To make a statement with them, use opposite colors such as silver on red.
You can also add architectural details to the wall such as mirrors or molding. Edwards suggests creating a box out of molding on the wall and painting an accent color on the inside. You can also add molding to furniture such as side tables or dressers.
Put up mirrors in a room. Adding big mirrors will not only enlarge the look of a space, but also allows the reflection of light and color. You can attach one large mirror for a focal point or several mirrors for a more whimsical look.


